Showing posts with label fabric cutting. Show all posts

Monday, September 11, 2023

Gerber Accumark Machine for Garment Production

FTC Disclosure: DIY receives financial compensation when the affiliate link(s) on this page are clicked on and a purchase is made.

Gerber Accumark is a widely used software suite in the fashion and garment industry, primarily designed for pattern making, grading, and marker making. While it is not a physical machine used in garment production, it plays a crucial role in the production process. Here's an overview of Gerber Accumark and its importance in the garment production process:
  • Pattern Making: Gerber Accumark allows designers and pattern makers to create digital patterns for garments. This replaces the traditional manual pattern making process, making it more accurate and efficient. Patterns are the templates for cutting fabric pieces and are essential for ensuring the correct fit and design of a garment.
  • Grading: Grading involves creating different sizes of a garment pattern from the base pattern. Gerber Accumark simplifies this process by allowing users to input grading rules and automatically generate patterns for various sizes. This ensures consistency and efficiency in the production of multiple sizes of the same garment.
  • Marker Making: Once patterns are created and graded, the next step is marker making. Gerber Accumark helps in optimizing the layout of pattern pieces on a fabric roll or sheet to minimize fabric waste. Efficient marker making can significantly reduce production costs.
  • Automatic Nesting: This feature helps in nesting the pattern pieces efficiently within the fabric, ensuring minimal wastage. It considers fabric width, pattern size, and other parameters to create an optimal layout.
  • Integration with Cutting Machines: Gerber Accumark is often integrated with computer-controlled cutting machines. Once the marker is created, it can be sent directly to these machines for precise cutting of fabric. This integration reduces manual labor and enhances accuracy.
  • 3D Virtual Prototyping: Some versions of Gerber Accumark offer 3D virtual prototyping capabilities. Designers and manufacturers can visualize how a garment will look and fit before it's physically produced, which can save time and resources.
  • Data Management: The software also provides tools for managing pattern and design data. This ensures that all relevant information about patterns, markers, and designs is organized and easily accessible.
  • Collaboration: Gerber Accumark often includes collaborative features that allow multiple team members to work on the same project simultaneously, even if they are located in different places.
  • Compatibility: Gerber Accumark is known for its compatibility with various CAD (Computer-Aided Design) file formats, making it easy to import and export design data.


In summary, Gerber Accumark is an essential software suite in the garment production process, offering a range of tools for pattern making, grading, marker making, and data management. It enhances efficiency, reduces production costs, and helps ensure the quality and consistency of garments produced in the fashion industry. While it's not a physical machine, it plays a critical role in modern garment manufacturing.

Also Read: Gerber Accumark Software for Garment Production

Pros and Cons: Gerber Accumark Machine for Garment Production

Gerber Accumark is not a physical machine but rather a software suite used in garment production for tasks like pattern making, grading, and marker making. Let's examine the pros and cons of using Gerber Accumark in the garment production process:

Pros of Using Gerber Accumark:

  • Efficiency: Gerber Accumark streamlines various aspects of garment production, such as pattern creation, grading, and marker making. This efficiency can lead to reduced production time and labor costs.
  • Accuracy: The software allows for precise pattern making and grading, which can result in well-fitting garments and a reduction in material wastage.
  • Cost Savings: By optimizing marker making and fabric usage, Gerber Accumark can help reduce material costs, which is a significant expense in garment production.
  • Customization: Designers and pattern makers can easily make adjustments to patterns and grading, enabling the production of custom-sized garments.
  • Digital Prototyping: Some versions of Gerber Accumark offer 3D virtual prototyping, allowing designers to visualize garments before physical production, potentially saving on sample creation and design iterations.
  • Integration: Gerber Accumark can be integrated with computer-controlled cutting machines, further automating the production process and reducing the risk of errors.
  • Data Management: The software provides tools for organized data management, ensuring easy access to patterns and designs, which can be valuable for maintaining consistency across product lines.

Cons of Using Gerber Accumark:

  • Cost: Gerber Accumark can be expensive to purchase and maintain, making it less accessible for smaller garment businesses or startups.
  • Learning Curve: The software has a learning curve, and training may be required for pattern makers and designers to use it effectively.
  • Hardware Requirements: To run Gerber Accumark smoothly, you need a computer system with adequate hardware capabilities, which can be an additional cost.
  • Compatibility Issues: While Gerber Accumark is compatible with various CAD formats, there may still be occasional compatibility issues when exchanging files with other software or collaborators.
  • Maintenance and Updates: Like any software, Gerber Accumark requires regular updates and maintenance, which can be time-consuming and potentially disrupt workflow.
  • Lack of Physical Output: Gerber Accumark is primarily a design and production planning tool; it doesn't directly control physical machines, so you still need separate cutting and sewing machines.
  • Dependence on Technology: Relying heavily on software like Gerber Accumark means that production can be disrupted in case of software failures or technical issues.

In summary, Gerber Accumark offers many advantages in terms of efficiency, accuracy, and cost savings in the garment production process. However, it also comes with some drawbacks, including cost, a learning curve, and potential technical issues. The decision to use Gerber Accumark should consider the specific needs and resources of the garment production business.

Friday, December 25, 2020

How to Make Great Patterns for Easy Sewing

Make Great Patterns
Creating sewing patterns is a great way to save money and time in the dressing room. You can use specific sizes to compose your custom corset. This will allow you to sew tops or dresses and make sure they fit. To make the pattern easier, please select a project that suits you and track it to make the pattern.

Take measurements. To create an accurate pattern that suits you. You will need to use a soft tape measure and record the following measurements:

  • Women’s bust: Wrap the tape around the entire bust.
  • Waist: Measure the narrowest part of the natural waist.
  • Dress height: Stand upright on the wall and ask someone. Measure from the top of the head to the bottom of the feet.
  • Men’s shirt collar: Wrap tape around the neck where the shirt collar is located.
  • Hips: Wrap tape around the widest part of the hips.
  • Length and width of the back measure the length from the neck to the waist. Measure the width along the widest part of the back.
  • Chest in men’s or women’s clothing: Measure the widest part of the chest above the chest.
  • Sleeve length: Hold the tape from shoulder to arm, as long as it fits the sleeve.
  • Shoulder length: The distance from the neck to the edge of the shoulder.
  • Upper arm width: Wrap the tape measure around the thickest part of the armpit near the armpit.
Draw the design sketch of the garment you want to make. Decide whether to make skirts, pants, or tops, and whether to have sleeves. Draw a rough design that comes to be visible in the garment. This will help you determine how to divide the garment into parts. So you know how many individual patterns you need to make.
  • For example, if you want to make casual clothes. You may need a front body, a back body, and a belt pattern on the sleeve.

Place a sheet of flat paper and trace the length of the pattern. Place a large pattern or brown postcard paper on a flat work surface. Make sure that one side of the paper is straight. Place a ruler 2 inches (5.1 cm) from the top of the paper. Measure from that point down until the length of the clothes you want.

  • For example, if you are 6 feet (1.8 cm) tall. Make your skirt 37 inches (94 cm) long to match the mini dress. Make the skirt 40 inches (101.6 cm) long and a knee dress, or 61 inches (154.9 cm).
  • The straight edge of the paper will become the front center (CF) of the pattern. Mark your length along this edge.

Tip: To determine how long to wear a piece of clothing. Check the height measurement and determine how much of the clothing to cover. If you are making a shirt or top. Please check the length of your back and where you want the shirt to fall with your waist.

Draw horizontal lines to mark the shoulders, bust, waist, and hips. Place a ruler so it forms a 90-degree angle on top of the line drawing for the center front line. Draw this top horizontal line, this will be your shoulder line. Lower the ruler to make the bust level. Move the ruler down again to draw a horizontal waist. The bottom of the shirt is the hip line.

  • Check your measurements to decide where to put the ruler on the shoulder path, bust position, waistline, and hip position.

Trace a line joining the size of the bust or chest, waist, and hips. Check your measurement and point out a point 1/4 of the measurement on the bustline. The same is true for the waist and hips. Next, use a pencil and a curved ruler. Draw a line to connect the points on the bust or chest line, waistline, and hip line.

  • For example, your bust size is 40 inches (100 cm), divide it by 4 to get 10 inches (25 cm). Mark 10 inches (25 cm) from the edge of the bustline.
  • This will make 1 edge of the central part of the pattern.

Draw the neckline and shoulders. Use a curved ruler to draw the cleavage from the top of the shoulder line to the centerline of the front. You can set the neckline as low or high according to your preference. Remember, the back neckline is higher than the front neckline. Leave room for the armholes and draw a curve from the shoulder down above the bustline.

  • To make your shoulders sit down, tilt your shoulders downward.

Add seam allowance throughout the curved ends of the work. Use the ruler or the seam allowance ruler to trace a path parallel to the outline of the pattern. Add 1⁄2 inch (1.3 cm) of margin.

  • You can add 1⁄2 inch (1.3 cm) of margin along the bottom line. This can make the hem of the clothes easier.
  • For example, if your pattern block is 61 inches (154.9 cm) long. Make the seam allowance line 61 1⁄2 inch (156.2 cm) long.

If you want the dress or shirt to have sleeves, create a sleeve pattern. View your measurements of sleeve length and upper arm width and determine the style of clothing sleeves you want. Draw the sleeve pattern on the crease.

  • For example, the length of the sleeve can be 5 inches (13 cm) long. You will use a 12-inch (30 cm) arm width measurement to determine the width of the sleeve.

Cut and paste the pattern fragments. Place another piece of pattern paper under the pattern you are tracking. Nail the paper together, use scissors to cut two layers along the seam allowance line. The bottom layer will become the back pattern. Be careful not to cut the curved neckline so you can adjust the front and back parts to your liking.

  • For example, you want to cut the front neckline below and then keep the back neckline high.
  • Mark each pattern you make so you can track them.

Tip: The number of patterns you need to make depends on the clothing you make. For example, if you want to make a simple shirt, you may only need 4 pattern pieces. Front 1, back 1, sleeve 2, neck collar 1. A wide flared skirt may require 6 identical parts, connected to a waist part.

Pattern Making Book

Make sure all seams have an allowance for sewing. Seams allowance required different allowances before fabric cutting.

Translate

Campaign

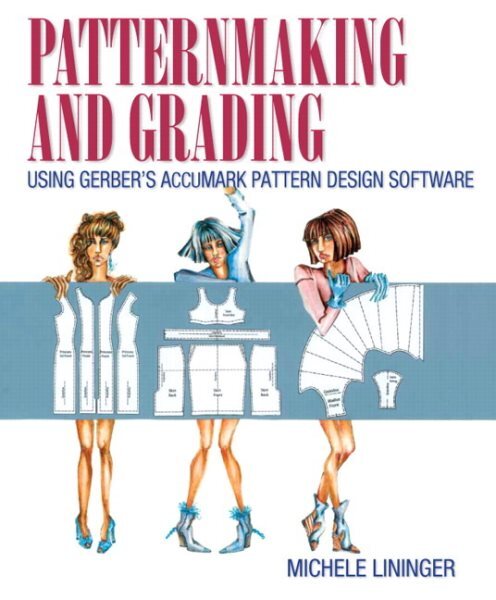
Patternmaking and Grading Patternmaking and Grading Gerber's AccuMark Pattern Design Software

For clothing design courses: pattern making, sorting, clothing development, and clothing production pattern creation. Sorting-using Gerber AccuMark pattern design, you can use the design software Gerber AccuMark pattern storage. Check all aspects of pattern making and classification. Focus on what is assigned to Job responsibilities, clothing styles, and classifiers. This article not only focuses on software commands. But also incorporates valuable information gained from the author’s extensive experience as an industry expert.

Price: US $87.77


Gerber Accumark Digitizer GTCO Calcomp Roll UP 36 x 48 Inch Digitizer Configured For PAD SYSTEM

Condition: Used: This Digitizer is For PAD SYSTEM PATTERN DESIGN SOFTWARE With This, you can digitize existing pattern pieces into your current PAD SYSTEM and edit, grading, marker making, plot You Can Digitize Any size Even bigger than Active Area which is 36 x 48 inch, you can digitize part portion, and combine into one large pieces. Tested And Working Just Fine Under PAD SYSTEM version 6, 7 Ready to work, preconfigured.

Price: US$1,599.00